Shop the Trend: Puffer Jackets
Where I live puffer jackets are practical for about 4 to 5 months out of the year. Recently they have become very on trend. Despite being a trendy item, I don’t believe they will go out of style any time soon. I’ve had at least one puffer jacket in my wardrobe for about 7 years now, and I plan to continue to wear them for years to come. I’ve compiled a collection of the cutest puffer jackets below.

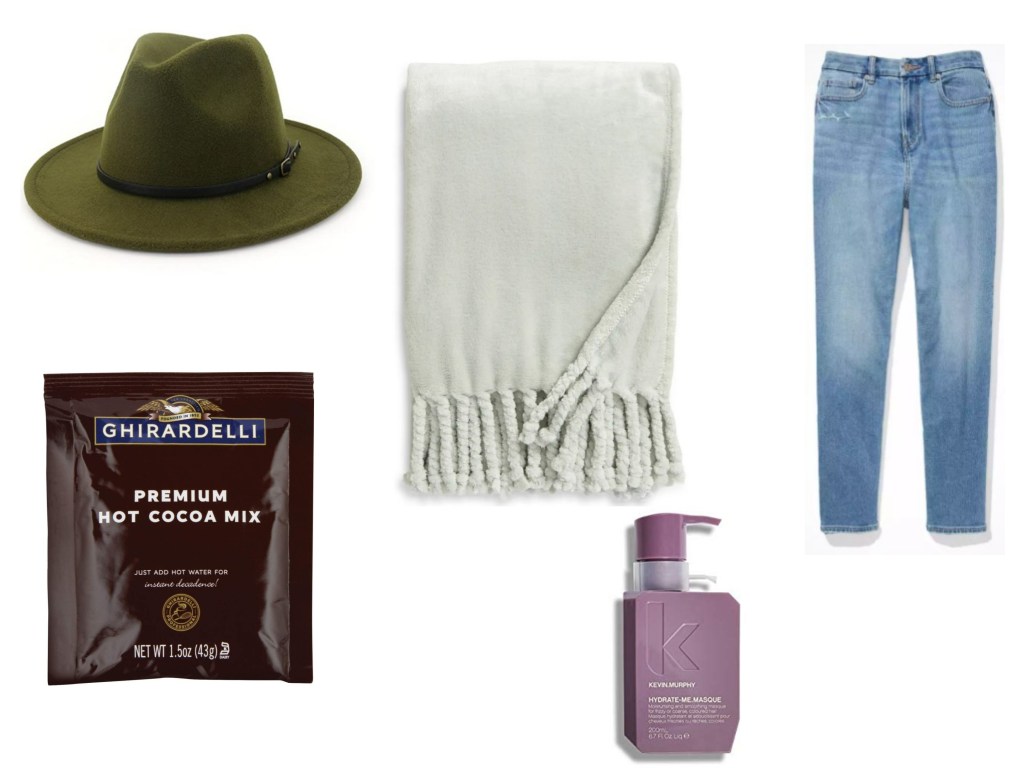
Winter Favorites
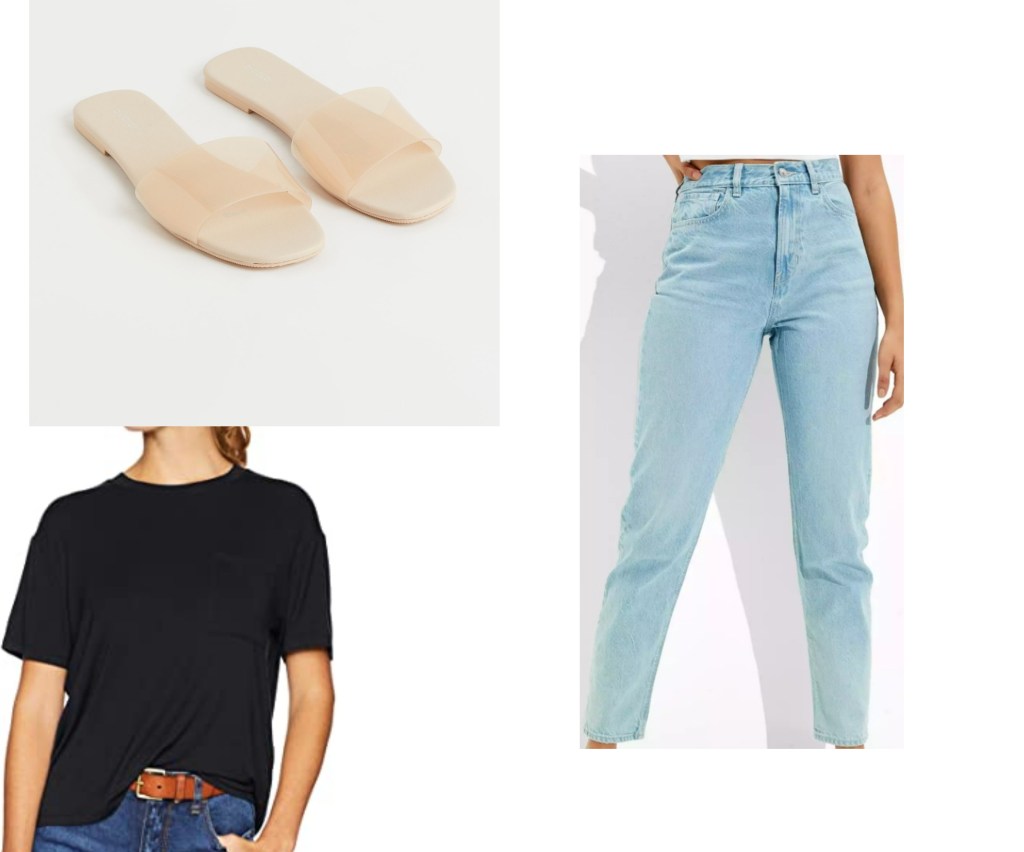
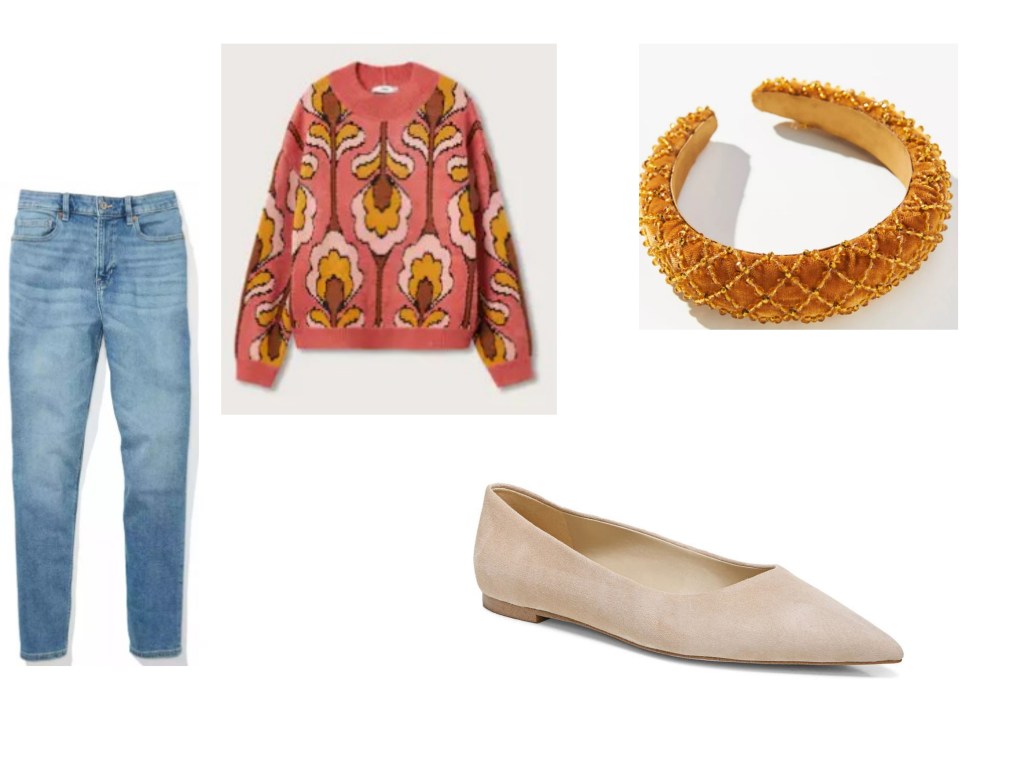
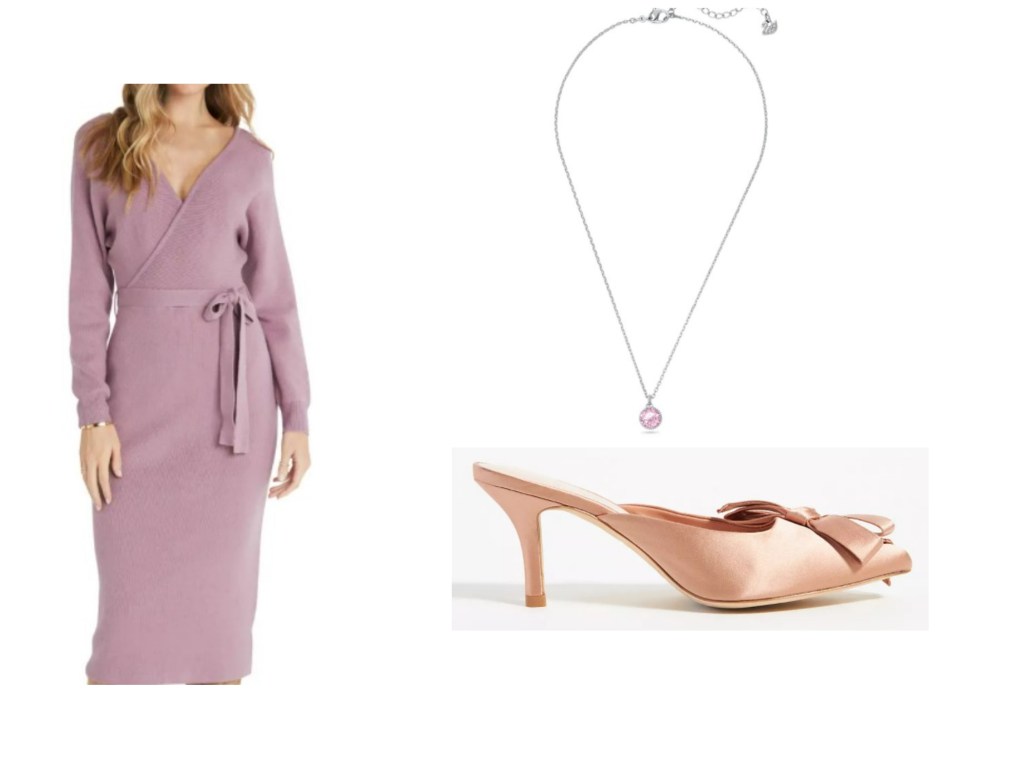
Valentine’s Day Outfit Ideas

Nutella Ice Cream Recipe
I know ice cream might not be the first dessert you think of during the winter BUT I highly recommend giving this ice cream recipe a try for Valentine’s Day. Trust me, you will wish you tried this recipe sooner.
Before you make this recipe make sure you read over the instructions of the recipe and the instructions of your ice cream maker. Making ice cream is not an instant gratification thing, but it’s worth it!
This Nutella ice cream would be great with crushed hazelnut and marshmallows on top to make a Nutella Rocky Road Ice Cream.

Ingredients
2 cups heavy whipping cream
1 cup whole fat milk
4 egg yolks
2/3 cup sugar
3/4 cup Nutella
Instructions
- Combine heavy whipping cream and milk into a pot on low-medium heat. Stir occasionally to avoid a film forming on top.
- While the milk mixture is heating up, combine egg yolks and sugar into a stand mixer and whisk until smooth. It will become a soft pale yellow color.
- Add Nutella to the sugar and egg mixture and whisk until well combined.
- Once the milk mixture begins to bubble on the sides of the pot, take a small measuring cup and add 1/2 cup at a time into the egg mixture while the egg mixture is slowly being whisked.
- Once you have about half of the milk mixture added to the egg mixture, take the milk of heat and add the rest of it to the stand mixer. Whisk slowly until it is well combined.
- Add your ice cream base back to the pot and turn the heat back on to medium low. Continuously stir until the mixture reaches a temperature of 170 to 175 degrees Fahrenheit.
- Take the mixture of the heat and pour through a mesh strainer into a bowl.
- Let the mixture cool to room temperature (about 20 to 30 minutes). Once it has reached room temperature, cover with plastic wrap (make sure the plastic wrap is in contact with the ice cream base to avoid a film forming on top) and place in the refrigerator for about 4 to 5 hours.
- Follow your ice cream maker instructions to freeze.
- Place it in an ice cream container and put it in the freezer.
This is a VERY creamy ice cream which is great, but that also means it melts slightly faster than other ice creams (especially since we are not using stabilizers). It’s best to make the ice cream the day before you want to serve it and freeze it overnight.
Special Equipment
Stand Mixer You’ll need this because it will be difficult to pour the milk mixture into the egg mixture while whisking at the same time.
Kitchen Thermometer You’ll need this to test the temperature of the ice cream base so you’ll know when it reaches 170 to 175 degrees farenheit.
Mesh Strainer Pouring your ice cream base through a mesh trainer is crucial to achieve a smooth ice cream texture.
Ice Cream Machine This ice cream machine is expensive but as someone who LOVES ice cream and makes it frequently, it’s worth it. If you want a more affordable option this one gets good reviews.
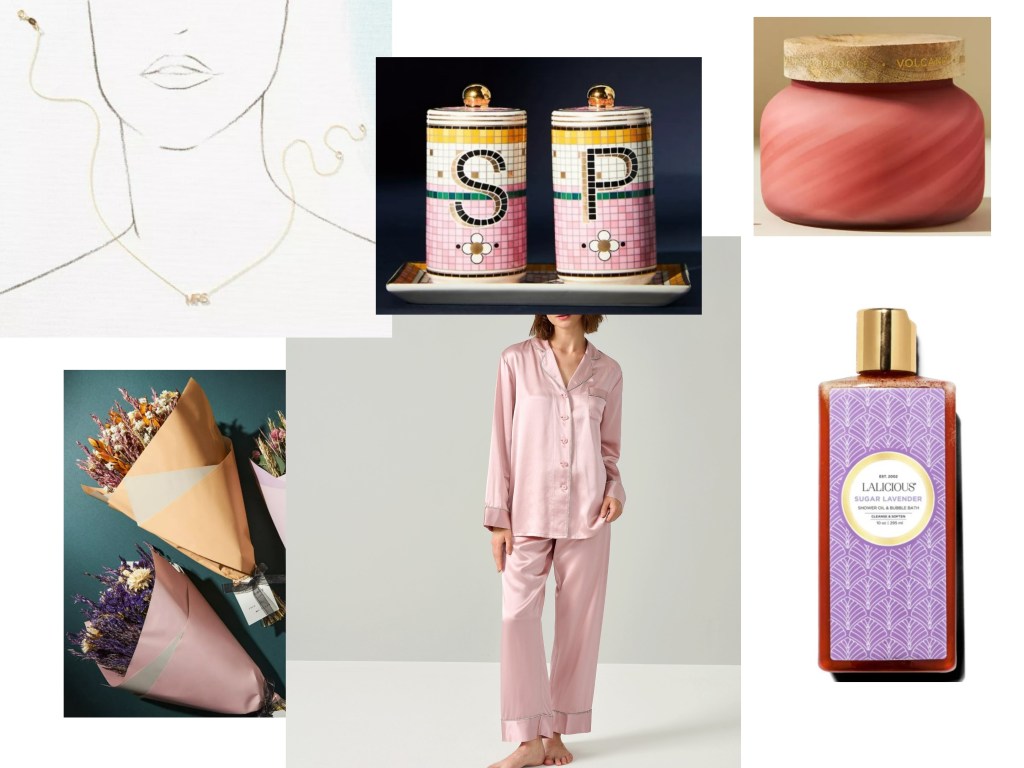
Valentine’s Day Gifts For Her
Valentine’s Day Gifts for Him

Outfit Styling Essentials
Getting dressed is a process, it’s more than just picking out clothes that look good together. You want to be comfortable in your clothes and prepared for the day. Being comfortable in your clothes is more than just picking a soft sweater or stretchy jeans, sometimes it takes a little extra help. Below are some essentials I always have in my closet that make me feel more comfortable and prepared.
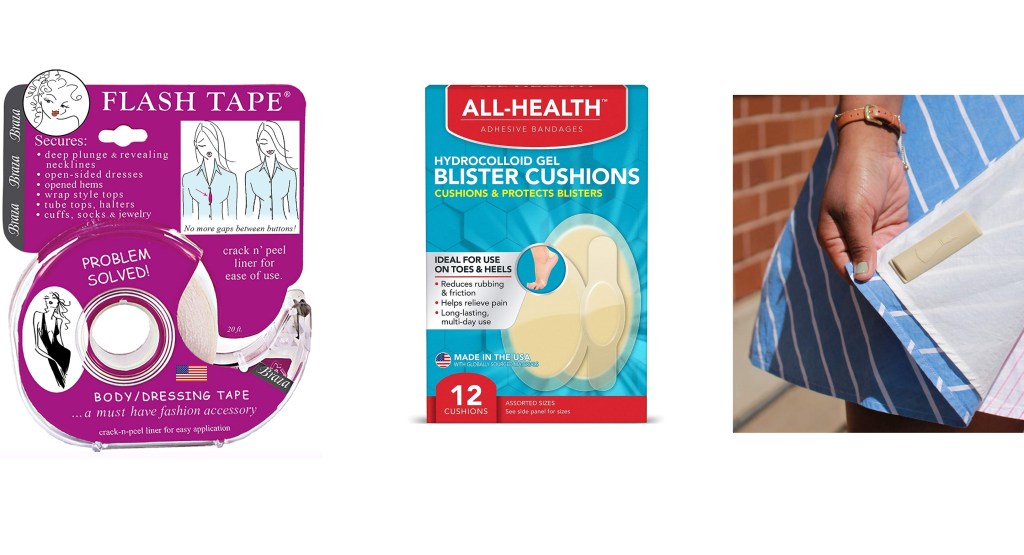
Fashion Tape is a very versatile tool to keep on hand. It can keep a deep v neck adhered to your body so when you bend over your boobs don’t fall out. Fashion Tape can close fabric that is gaping from buttons. It can even temporarily alter the length of dresses, pants, and skirts. This is also a must for any brides to keep in your bridal emergency kit.
Blister Cushions I’ve learned the hard way to keep blister cushions on hand. I recently bought a pair of flats that left horrible blisters on my ankles. It’s much easier to prevent blisters than to treat them.
Dress Weights I don’t think a lot of people know that dress weights exist and I can attest they are a game changer. I have one dress that I swear will fly up even if someone exhales heavily near me. These won’t hold your dress down in strong winds but will prevent your dress or skirt from flying up on breezy days. You can take your dresses and skirts into a seamstress to get permanent weights sewn onto your garments, but I have always worried about washing them with the weights so I like this temporary solution.
How To Create A Hat Wall
I was having issues storing my hats on the shelves in my closet because the shelves were too shallow. After about the 100th time of them falling off the shelves I decided to create a hat wall. I think hat walls are so cute and in my case it was a really practical solution too. Below is a guide to creating a hat wall.

There are a few different display options when it comes to hat walls. Amazon sells a few hat wall displays (pictured below) but I ultimately I did not like these options because the hats might not lay flat, the clips could leave marks on the hats, and to be honest they all looked kind of cheap.

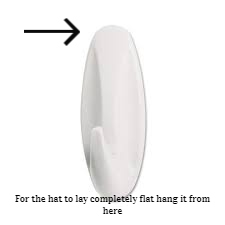
Instead of using one of the options from Amazon I used command hooks to display the hats. If your hats have a large enough tag, and you want them to be more secure, then I suggest putting them on the hook using the tag. However by hanging them directly on the hook your hat might not lay flat against the wall. This could potentially cause the brim of the hat to warp over time. I have my hats just sitting on the top command hook rather than on the hook itself. This helps the hats lay flat against the wall and I haven’t had any issues with them falling off.
I chose to only display the larger hats I own since those are the ones that didn’t fit on the closet shelving. I do also have baseball hats but chose not to display those because they’re not the most aesthetically pleasing and they fit perfectly on the shelving in the closet.
My Favorite Cookbooks
It’s no secret I love cooking, but I rarely create my own recipes. About 80% of the time I’m following someone’s recipe, rather than creating my own. Given how much I cook, and how may recipes I’ve tried, I’m well versed when it comes to picking delicious and reliable recipes. So what are my favorite cookbooks? Below is a list of my favorite cookbooks and why I love them.
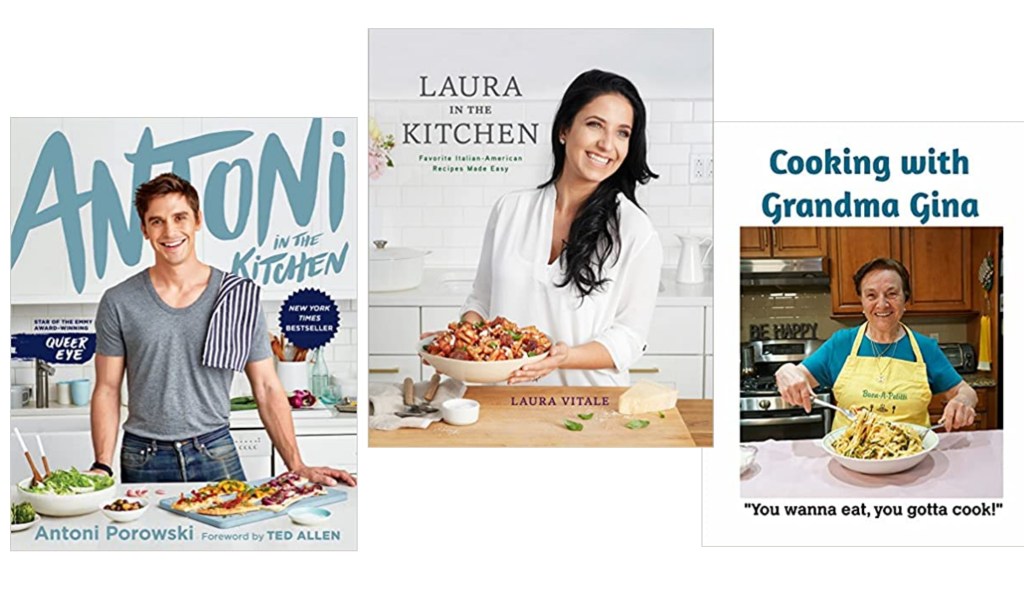
Antoni in The Kitchen This cookbook has really unique flavor combinations that I wouldn’t think of myself. Some of the recipes call for ingredients that I don’t typically use (or have never used) and I like that it pushes me out of my comfort zone in that way.
Laura in the Kitchen Every recipe in this cookbook has been so well tested you just can’t go wrong with them. I love that it has a bit of everything from challenging recipes to quick dinners.
Cooking with Grandma Gina I love that this cookbook has super authentic Italian recipes that you would never come across on a place like Pinterest. Italian food is my favorite so this cookbook is a must for me.
